
Biscotti: that shelf-stable, tooth-breaking classic coffeehouse staple. Always waiting at the front of the register, I have thought on more than one occasion: "Who wants that rock-hard carb-y toothbreaker with their coffee?"
Then I promised my company I'd bring in a snack to serve at popup café that would be happening in our lobby.
A snack for the entire company. All 280-ish of them. What. Was. I. Thinking.
I do this all the time. I think to myself, "I love cooking and I love entertaining. I can pop out a few extra cookies/appetizers/servings, no problem!". Except it's not a few extra cookies: it's roughly 240 more than the average cookie recipe makes. If those cookies were miles, they'd almost stretch clear across the entire state of Pennsylvania.
So, yeah. Not just "a few extra". So what did I do?
I racked my brain for any ideas that could easily be made in my two countertop itty bitty corner kitchen. I thought about muffins, cookies, breads. I looked in my own blog archives for inspiration. Finally, I made a decision I have never made before. I decided to make something for someone else that I would never eat myself: Biscotti. Ew. But I was desperate, and all of the biscotti recipes I saw made a TON of cookies, could easily be made in batches, and required nothing stupid like refrigerating overnight, shaping into 45 perfect hearts, or anything else of that nature. Plus, I've seen these people eat pizza for breakfast that was left out in the cafeteria from parties the night before, unrefrigerated. Pizza with meat on it. They'd be fine. So, biscotti.
While making the first batch, the dough seemed too sticky. I felt surely something was not right. It was hard to shape into the long, flat log that would later be baked then sliced into the little cookies. It was all over my fingers and my pan. After finally shaping it, I watched in the oven as it baked to an ugly, shapeless oblong blob. I texted a friend a picture with the caption, "I have major concerns." I did. I planned on throwing this first batch out and trying again. 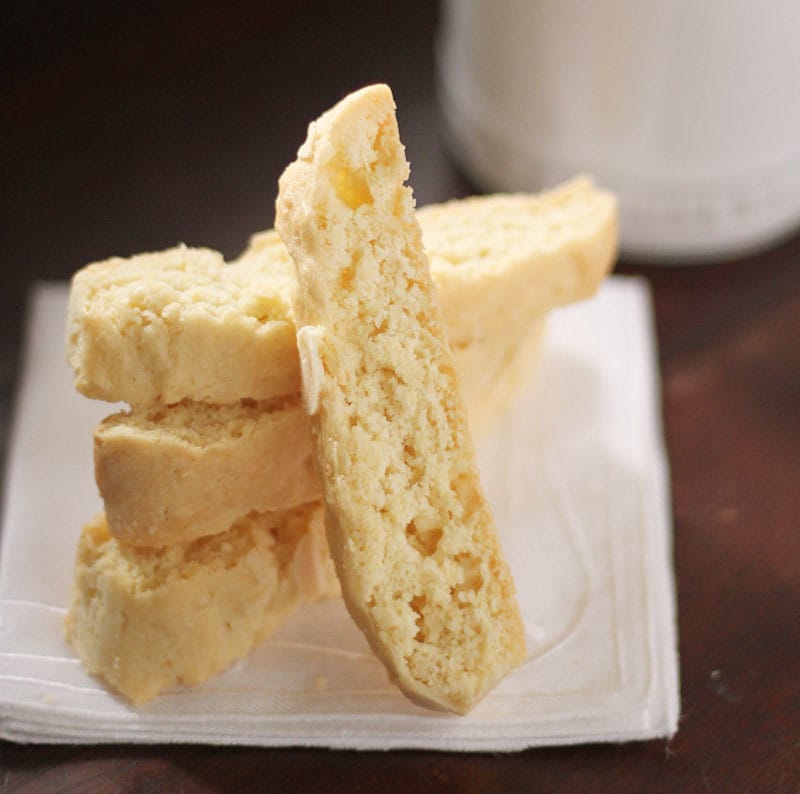 It came out of the oven, and I had to admit -- it smelled lovely. Toasty almond aroma filled my little kitchen within minutes of being out of the oven. Using a pizza cutter, I quickly rolled over the hot biscotti loaf, making over 40 little strips of cookie. Before laying them flat to bake off for a few more minutes, I took a bite of a scrap that jumped off of the pan, and I was shocked to find out that they were delicious!
Like a tiny cake, they were soft and a little crumbly. The flavor is mildly sweet -- like a sugar cookie with half the sugar. After baking post-slicing, the have a nice crispy outside, but the inside is still soft. Exactly what you would love to have with a cup of coffee.
Who knew?
Almond Biscotti
Ingredients
- ½ cup Vegetable Oil do NOT substitute butter
- 1 cup White Sugar
- 3 Eggs
- 1 Tablespoon Almond Extract
- 3 ¼ cup All-Purpose Flour
- 1 Tablespoon Baking Powder
- ¾ cup Sliced Almonds
Instructions
- Preheat the oven to 375 degrees. Line two cookie sheets with parchment paper.
- Cream together the oil, sugar, eggs, and almond extract. In a separate bowl, combine the flour, baking powder, and roughly half of the almonds.
- Mix the dry ingredients into the creamed ingredients. The dough will feel heavy and be sticky. Do not add more flour!
- Separate the dough into two sections. For each section: dump the dough onto the parchment paper-lined cookie sheet. Folding the parchment paper over the dough to protect it and your hands, press the dough down and shape into a log. The dough should be about ½" thick. If you have a pan that is long enough, it is fine to make one long log. Once the dough is shaped, top with the remaining sliced almonds.
- Bake for 25 minutes. Remove from the oven, and slice with a pizza cutter, approximately ½ - ¾" thick.
- Place the slices with one of the cut sides down, back on the baking sheet, and bake for another 5 minutes.
When you put sliced biscotti back on pan do you lay pieces on their sides or leave them standing up?
Oh, good question! I lay them on their sides ( so one of the cut sides is directly on the pan ). I'll update the directions to include that tidbit 🙂